RS3 1 to 99 Smithing Guide

Smithing is a skill available to both F2P (Free to Play) and P2P (Pay to Play) players. It is the process of turning mined ores into bars, and these bars can further be developed in various weapons, armor pieces, and other tools. Training smithing depends entirely upon whether you’re looking to make Runescape Gold or simply max out. In the following guide, we will show the fastest and the most efficient methods to max out your Smithing skill. So, read on!

Quests

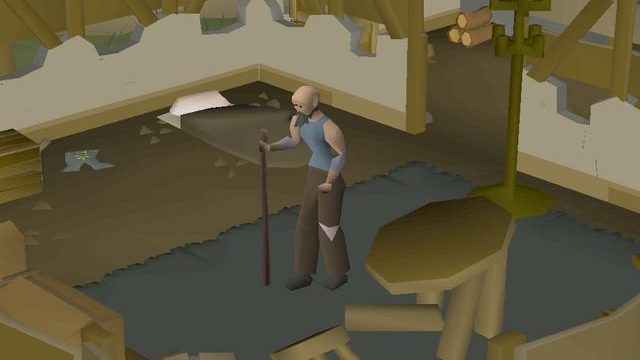
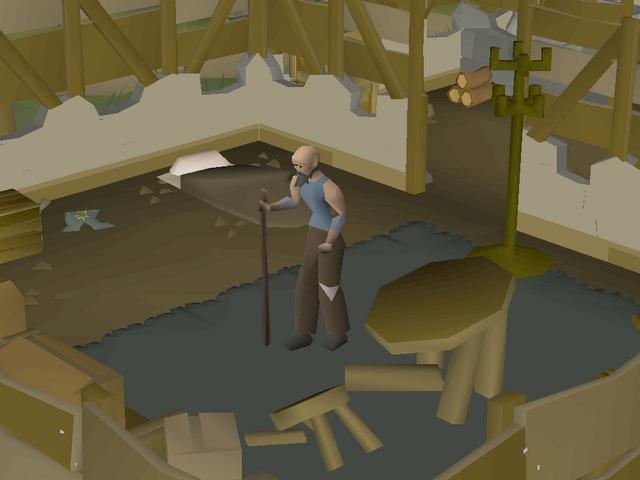
The best and foremost way to skip a few starting levels of your Smithing skill is by completing quests. The only quest that offers experience in Smithing and can be done by a beginner is The Knight’s Sword quest. You will only require 10 Mining to progress further, and it’ll save you a lot of time because the quest will straightaway grant you 12,725 experiences that can help you achieve 29 levels. It will take you about 30 minutes to complete, after which, you can focus on Smithing Steel Bars and making Steel Plate Bodies until you hit level 30.

Levels 30 to 40

Once you hit level 30, you can start making Mithril Plate Bodies, and for this phase, you will need exactly 200 Mithril Bars. Yes, it is a slow method, but it provides a good amount of experience and doesn’t require you to spend much as it isn’t expensive.

Levels 40 to 50

Once you hit level 40 for smithing training rs3, you can have numerous options to progress further. You can choose to destroy armors that also reward players with a good amount of experience per hour. However, it will drain a lot of RS3 Gold as you level up to reach the highest possible armor (Burial Armor). Alternatively, you can make Adamantium Plate Bodies, and for this method, you will need exactly 380 Adamantium Bars.

Levels 50 to 60

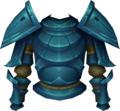
Once you hit level 50, you can easily level smithing with Burial equipment. You can progress five times faster by destroying +3 Rune Plate Bodies, rather than creating them from scratch. If you’re wealthy enough, then I suppose this method would be an ideal choice to go with. Alternatively, you can stick to Smithing Rune Plate Bodies from zero to the highest possible equipment, and this method will require you to have exactly 720 Rune Bars.

Levels 60 to 70

Once you hit level 60 for smithing training rs3, you will have three options; either create Orikalkum Plate Bodies from zero to the highest possible upgrade (requirement: 1330 Orikalkum Bars), upgrade Orikalkum Plate Bodies from +2 tier to +3 (requirement: Orikalkum Plate Bodies x67 and Orikalkum Bars x1340), or destroy the +3 Orikalkum Plate Bodies, which will require a total amount of 67.

Levels 70 to 80

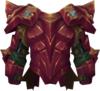
Once you hit level 70 in this 99 smithing guide rs3, you can either use a cheap but slower method by creating Necronium Plate Bodies from zero to the highest possible upgrade, a stable method by upgrading Necronium Plate Bodies from +3 tier to +4, or a fast and expensive method by destroying the +4 upgraded Necronium Plate Bodies. You will require 2500 Necronium Bars, 63 Necronium Plate Bodies & 2500 Bars, or 63 Necronium Plate Bodies, respectively.

Level 80 to 90

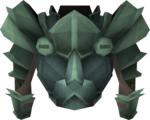
Once you hit level 80, you will again have three options; either create Bane Plate Bodies from zero to the highest possible upgrade (requirement: 4800 Bane Bars), upgrade Bane Plate Bodies from +3 tier to +4 (requirement: Bane Plate Bodies x120 and Bane Bars x4800), or destroy the +4 Bane Plate Bodies, which will require a total amount of 120.

Levels 90 to 99

Finally, once you hit level 90, you can either use a cheap but slower method in this 99 smithing guide rs3 by creating Elder Rune Plate Bodies from zero to the highest possible upgrade (+5), a stable method by upgrading Elder Rune Plate Bodies from +4 tier to +5, or a fast and expensive method by destroying the +5 upgraded Elder Rune Plate Bodies. You will require 7690 Elder Rune Bars, 96 Elder Rune Plate Bodies & 7690 Bars, or 96 Elder Rune Plate Bodies, respectively.

OSRS 1 to 99 Construction Guide

Construction is a very upfront skill to train as it’s effortless. However, the costs to level up are significantly higher than the others. You can either train it in bits or take up the skill at the very end of your journey.

Honestly, it’s not worth training Construction if you’re just going to end up broke. You also need to learn the ways to the intensive clicking and rhythm to get peak efficiency. Anyhow, we’ve broken down the best ways to train in this guide. We hope it helps make the grind easier!

Level 1 to 8

You can skip the early levels of making chairs by completing the quest called Daddy’s Home. It grants you about 944 Construct XP, as well as a house if you don’t already have one.

Level 1 to 4

Starting out you need to first purchase a house in either one of these areas: Varrock, Seers’ Village, Falador, Prifddinas, Ardougne, or Hosidius. Once done, grab a hammer, a few nails, and some planks to start building Crude Wooden Chair until level 4. You need to switch to ‘building mode’ first.

Level 4 to 9 or 8 to 9

At level 4, start making Wooden Bookcases in the parlor area of the house. If you’ve completed Daddy’s home, and you’re already level 8 Construction, then only make four Bookcases to get the level you need.

Level 9 to 15

Now, head to the kitchen area of your house and start building seven Wooden Larders until level 15 Construction. You can stop using normal Planks and Steel Nails after this.

Level 15 to 22

At level 15, head to the workshop area and repair three benches using Oak Planks. Next, switch to Crafting Tables at level 16 and move on to the next once you reach level 22.

Level 22 to 33

At level 22, you can start building Oak Dining Tables. You need to do this in the dining room, and it’ll take you exactly 39 tables to reach level 31. Next, switch to 10 Carved Oak Tables till level 33.

Level 33 to 52 or 74

Now you need to decide on whether you need the best XP per hour at the cost of your money or another approach that cuts down the cost.

First, start building Oak Larders in the kitchen area until you reach level 52. You need to make about 220 of them to reach the end goal. If you want to prioritize XP now, then move on to the next method, or else continue making Oak Larders (2,246) till level 72 to cut down the costs.

In between, when you’re at level 40, you can pause the grind and head to the Servant’s Guild (East Ardougne) to recruit a butler. You can have him bring the planks from your bank for you, basically saving time to run back and forth.

Level 52 to 77 or 99

At level 52, you can start building Mahogany Tables. You need to make about 15,370 tables to reach 99 Construction and 1,610 tables to reach level 77. The duration of the grind depends on your efficiency.

Position yourself to the northwest frontside of the table space. The middle space should be positioned to the left of the bottom of your toolbar. This way, you can easily right-click and select the build option without having to move your mouse.

At level 58, can build your servant a moneybag in the corner of his/her bedroom. Fill it with a huge stack of OSRS GP and the servant will no longer bother you. We recommend using the Demon Butler at this stage.

Level 77 to 99

If you’re a hardcore player looking for quick levels, then you can switch to Gnome Benches at level 77. You need to construct a Superior Garden and stand in the space between the two benches. Cycle between the two to get around 1.1M XP per hour. But hey, you’re going to feel a whole lighter considering it costs about 158M OSRS Gold till level 99.

Level 74 to 99

Alternatively, if you’re low on GP, you can head for the dungeon. Position your character on the left side and in front of the dungeon building space. Keep your cursor in the same spot as how you were doing it with Mahogany Tables, and finally, start building! Also, make the best use of your Demon Butler to fetch your planks. You’ll need to make around 19,897 Oak Dungeons to get to level 99 Construction.

Conclusion

There are several other ways to level your Construction, but the method we’ve mentioned above is known to be the best in terms of efficiency. Either way, whichever path you choose, you’re still going to lose money. Make sure you have stacks of Runescape Gold before you begin. Good luck!

Runescape: A Guide to Sheild of Arrav, a Free to Play Quest

For this quest you will need to find a trustworthy friend who hasn’t yet finished the quest. You will have to make sure you communicate with each other in order to complete the quest and gain the reward. Now both of you will have to join different gangs at a later point during the quest, make sure you and your friend understand this detail. To start the quest you will need to travel to the Varrock castle library and ask the Librarian Reldo if he has a quest for you to complete. He will tell you about the Shield of Arrav and tell you that there is a book on one of the shelves.

You then will search all the bookshelves until you find a book. You will see the book in your inventory just click on it to read the book. After you finish go back to Reldo and he will tell you that you need to talk to Baraek the fur seller. Now you will need to go back to a bank and get twenty coins talk to the fur seller in Varrock square and give him the twenty gold coins to pay him for the information. If you then make your way to the southern gate of the city you will see a tramp in an alley near the sword shop. If you ask him he will tell you about the Black Arm Gang.

Now you and your friend will need to choose different gangs. There are two gangs the Black arm gang and the Phoenix gang. Your task will depend on which gang you join, and your affiliation will be used in future member only quests.

Let’s say that you chose to become a member in the Black Arm Gang. Then the gang’s leader Katrine will tell you that you need to steal some crossbows from the other gang. This is where you will need your friend to help you.

Your partner will be asked one of two tasks to complete the first one could be to retrieve a copy of a newspaper. This paper does not exist just tell your friend to return to the gang with that answer. In past versions of the quest they have asked the phoenix member to find a scroll. If this is the case then you will have to tell your friend that they need to go to the Blue Moon Inn. There they will have to kill Jonny the beard in order to retrieve the Scroll. Once he has the scroll he will need to take it to their Gang’s headquarters and talk to the gang leader. The gang is in a small house where the red explanation point is on your mini map. The leader will give your friend a key to a weapon storage house which is the house east of the hangout. Your friend will need to grab the first half of the shield from one of the bedrooms in the hangout. His shield half will be in a chest. Then he will need to go up into the store house and steal some crossbows from the house and return those bows to your gang’s leader.

Now you need to get your half of the shield. It will be in your gang’s hideout on the second floor in a cupboard. Get the other half of the shield from your partner and talk to the king inside of the Varrock castle. He will ask you to go to the museum to show the curator to authenticate the shield. The curator will give you two scrolls, one for you and one for your friend. Give your friend his scroll and go talk to the King again for your reward. Congratulations you have now finished this quest you will be rewarded with one quest point and 600 gold coins!

Dragon Leather Armor for Runescape Rangers

There are some Ranger armors in the free mmorpg game of Runescape that are from Dragonhide. This dragonhide is the by-product of dragon slaying throughout the game, where the loot and drops from fighting are typically worth the battle to slay a dragon. There are four different levels of dragon leather armor in the game for the Ranger class. These levels are green, blue, red, and black. They have different required levels and attack bonuses, plus defense bonuses.

Green Level Dragon Leather Armor

Green Chaps – The green chaps need a 40 in Ranged skill, and gives 8 ranged attack bonus and 22 ranged defense bonus.

Green Body – The green body needs a 40 in Ranged skill and in Defense, and it will give 15 ranged attack bonus and 40 ranged defense bonus.

Green Vambraces – The green vambraces need a 40 in Ranged skill, and gives 8 in ranged attack bonus.

Blue Level Dragon Leather Armor

Blue Chaps – The blue chaps need a 50 in Ranged skill; it will give an 11 to ranged attack bonus and a 25 to ranged defense bonus.

Blue Body – The blue body needs a 50 in Ranged skill and a 40 in Defense, it gives 15 to ranged attack bonus and 45 to ranged defense bonus.

Blue Vambraces – The blue vambraces need a 50 in Ranged skill, and it gives 9 to ranged attack bonus.

Red Level Dragon Leather Armor

Red Chaps – The red chaps need a 60 in Ranged skill; it will give 14 to ranged attack bonus and 28 to ranged defense bonus.

Red Body – The red body needs a 60 in Ranged skill and a 40 in Defense, it gives a 20 to ranged attack bonus and 50 in ranged defense bonus.

Red Vambraces – The red vambraces need a 60 in Ranged skill and it will give a 10 in ranged attack bonus.

Black Level Dragon Leather Armor

Blessed Dragonhide Coif – The blessed dragonhide coif needs a 70 in Ranged skill and 40 in Defense, it will give 7 in ranged attack bonus and 8 in ranged defense bonus.

Black Chaps – The black chaps need a 70 in Ranged skill and it will give 17 in ranged attack bonus and 31 in ranged defense bonus.

Black Body – The black body needs a 70 in Ranged skill and a 40 in Defense skill. It will give 30 to ranged attack bonus and 55 in ranged defense bonus.

Black Vambraces – The black vambraces need a 70 in Ranged skill. It will give 11 in ranged attack bonus.